 A tasteful use of reverbs is one of those not-so-secret things that set the pros apart from the amateurs.
I would argue it’s almost as important as things like compression and EQ.
For instance, if you lose that chorusing effect on your piano, your mix won’t likely fall apart; if you lose the reverb, I guess it will.
On the other side, it’s very easy to overdo it.
Too much reverb and everything will sound washed out and lose definition.
So how to deal with it? From spring to non-linear, how to choose which one to use?
Confusion all over the place… Hopefully my suggestions will help you sort this out!
It’s All About Realism
Reverb is synonym of realism. When we listen to something, we all perceive the natural sound of the space around us. No matter if it’s a small hall or a big arena, that’s part of the sound we hear and like.
The downside is that, with modern close-miking recording techniques, we are taking the sound of that space (thus the reverb) out of the equation, making everything sound so-damn-close that’s not real! Our brain won’t like it, as it’s not what it’s expecting to hear.
That’s our ultimate goal with reverbs; to recreate that illusion of realism and give our ears what they want.
Where To Start?
As always, when mixing, recording and so on, you need to think about what you want to accomplish with your mix. It seems obvious, but it’s very easy to fall into the loop of guessing and trying every possible combination. That simply won’t help and will just give you a nasty headache.
I usually setup my sessions with 3 different reverbs aux busses to start with. My choices are based not only on the decay time of each reverb, but also on other tonal qualities of the reverb itself and, as said above, on what I want each reverb to do.
Here’re my weapons of choice.
#1. The Small Room – Ambience And Air
My first pick is a small room, with a decay time between 350ms and 450ms.
This is not the kind of reverb you’re going to notice. It won’t make much of a difference except for one huge thing: it adds air and ambience to your track, puts it in a space.
In other words, it moves your close-miked singer from singing just as if he was glued to your ears, to singing a few feet from you. Much more natural, don’t you think?
#2. The Plate – Depth And Distance
The second choice is a plate or a chamber. In all honestly, most of the times this pick depends on what I had for breakfast… For the time being, let’s pick the plate.
This reverb has the task of adding things like width, depth and distance between the different instruments. You use faders to set the level, pan pots to choose the position left to right and plate, medium rooms or chambers to set the position of an element front to back.
To reach our goal, we need some tail. That’s why I set the decay time for this reverb a bit on the longer side, usually between 800ms to 1.2s, according to the tempo of the song.
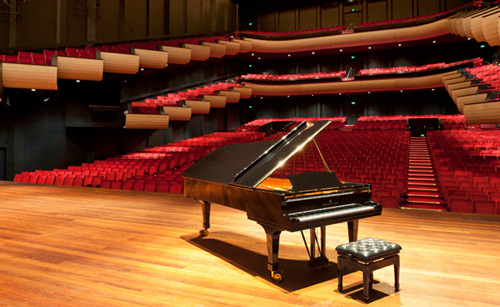
#3. The Hall – Height And Sustain
Last but not least, there is the hall. While plate reverbs create their sound by using a mechanical device, plate algorithms have been written to emulate real spaces, like big concert halls or cathedrals. In this case, the choice between them is based upon what I had for lunch!
I use the hall to give my mix that missing 3D illusion and sense of height above the head, while giving the track a little bit more of sustain.
I know most famous concert halls have a decay time around 2/2.5s with a pre-delay around 20ms, so that will likely be a good pick where to set the reverb time.
With this reverb, I usually roll-off some of the highs from the tail. A real hall has air, seats, curtains and so on, and all that stuff “eats” sound, mostly mid-high frequencies. Make sure to take this into account.
Some More Suggestions
Of course you don’t have to send each instrument to each reverb.
For instance, I usually use the plate on stuff like drums or guitars, while sending things like vocals and pianos to the hall, and then using the small room whenever I need to get some distance from the microphone.
There are many different kind of reverbs, and guess what… they all sound different!
For instance, one may sound darker or brighter than another…So would be a good idea to compliment the sound of the reverb with the sound of the instrument.
Got a twangy and bright electric guitar, maybe a darker plate would be a good starting point…
Want to add some extra sizzle and sustain to your snare, perhaps a bright plate with a hint of hall should get you there without touching the EQ…
Is your kick drum or bass way too dry? Try adding a small room to it… You get the idea.
As for choosing the “right” level, move the fader up till you can barely hear the reverb, then simply back it off a dB or so. You can’t be wrong.
These are just a few suggestions, but as for anything else in audio, the only real rule here is to do some critical listening, trust your ears and then make decisions based on what you want to get.
Discover New Sonic Perspectives
Don’t underestimate the power of reverb. In both senses, too much or too little, it will have a dramatic impact on how your final mix will sound!
Maybe you spent years listening to all the subtle textures of different EQs and compressors…
Now think a bit about reverbs, experiment creating landscapes with them and discover new perspectives. This will give you a leg up on other mixers! Seriously.
Got a final question for you: how did you approached reverbs before reading this article?
What were the major issues you faced while dealing with them? Write a few lines in the comments below and let me know!